|
DIY Cabinet Refacing Transforms your Kitchen CabinetsDIY cabinet refacing can save a bundle of money which can be put towards cabinet hardware or even kitchen decor. With a little bit of carpentry skills and a small amount of money you can literally transform the look of your kitchen within days without the headache of a major kitchen overhaul or the price of installation of new cabinets. So just what is involved in a cabinet refacing job? And are you up to the task? If you are able to take simple measurements and submit these to a cabinet refacing company you too can change the look of your kitchen. Light carpentry skills such as cutting end panels with a circular saw and cutting out the veneer skin with a box cutter are the cutting requirements. If you have carved out the time to sand down the exterior by hand you are ready to begin this project. 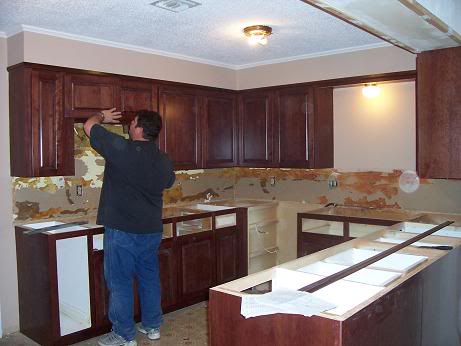
The first step of a DIY cabinet refacing job consists of ordering the supplies. The link below gives you complete instructions on how to take measurements for the materials you order.
DIY Cabinet Refacing Instructions and Supplies
After you have double and triple checked your measurements and submitted your order make sure to visually inspect the contents of the shipment when it arrives. Was the shipment damaged in transit? Are there any pieces missing? Also make sure to survey the product itself to determine that it has passed your approval for quality. If you spot any problems contact the company immediately to rectify the situation.
When beginning DIY cabinet refacing, make sure you have all your tools in place and ready to go. It is highly recommended by cabinet manufacturers to sand the surfaces that will be accepting the veneer skin with 150 grit sandpaper. This usually means sanding the top and bottom rails and stiles that surround the cabinet box.(Forget about getting out the power sander- sanding by hand is recommended to rough up the surface not remove layers!)
The sanding is done primarily to remove dirt and grease that has accumulated on the cabinet surfaces. After this step, wipe with a tack cloth to get rid of any leftover dust and lightly clean with a damp cloth making sure not to saturate the wood. These steps will assure the veneer backing adheres securely to the surfaces permanently.
The first step is to install the plywood pieces to the ends of the cabinets. It is recommended that you use plywood instead of self adhesive veneer on the end panels because this is such a large surface area that takes a beating due to it's exposure. You could also substitute door frames for the end panels for a more custom look and less cutting work. If you are taking on a DIY cabinet refacing project and are not exceptionally skilled in using a saw you may wish to you substitute cabinet doors for the end panel pieces.
After applying the end panels and gluing and nailing them into place you are ready to begin the process of applying the self adhesive veneer skin to the face frames. For DIY cabinet refacing, cut the pieces about 1/2 inch to 2 inches larger than needed to leave room for error. It is imperative that you begin with the stiles and work with just enough backing from the top of the strip to anchor it to the face frame. This stuff is super sticky so you want to make sure it is lined up perfectly before going on! You then begin peeling as you apply pressure to the skin pressing down as you smooth it out. Repeat this step when applying to the rails. Be sure to work on one opening at a time in order to apply the covering evenly to assure it is square with the top or side of the pieces. After you have applied the veneer skin, take out your box cutter or razor knife to trim the excess off the cabinet face.
Supplier of quality DIY refacing materials
|
 Hanging doors takes some light carpentry skills. The hinges should be placed about 2 inches from the top and bottom of the doors and secured to the frame. You want to make sure to place the hinges in a spot so that they will make new holes on your cabinet face. This will assure the screw holes aren't stripped out and have a good tight hold. You should receive special instructions with your hinges which differ according to whether they are concealed hinges or exposed hinges.
